Blackboard - Create sessions in Collaborate - Kunnskapsbasen
Blackboard - Create sessions in Collaborate
On this page you will find information about how to create new sessions in Collaborate, and explanations of the various settings.
Innholdsfortegnelse [-]
Topic page on Blackboard | Pages tagged with Blackboard
What is a Session?
A session is a Collaborate room in which students and instructor can participate. A session can be defined by date and time, or be without an end. A session without an end is called an open session.
Every course in Blackboard is automatically given its own course room in Collaborate, this is called a session. A session can be used by both instructors and students. Students can join and leave this session freely, unless a instructor chooses to lock the room. A teacher can also create new sessions that are only available during a specific time period, and where students only can enter while the session is active.
Roles
Within a session, the participants can have three different roles, all with different privileges.
- Moderator: A moderator has all the administrative privileges. A moderator can change the role of each participant during the session, see who has their hand raised. As well as take it down or remove participants from a session. The latter does not apply to other moderators.
- Presenter: Can be used to give participants the possibility to present some content, but without having the full administrative privileges. A presenter can both share and edit content. They can also see a list of participants that have raised their hands.
- Participant: Has the ability to share audio and video, to chat with other participants, and to draw on whiteboard or files.
Create a session
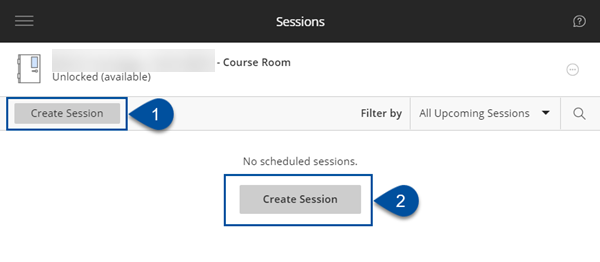
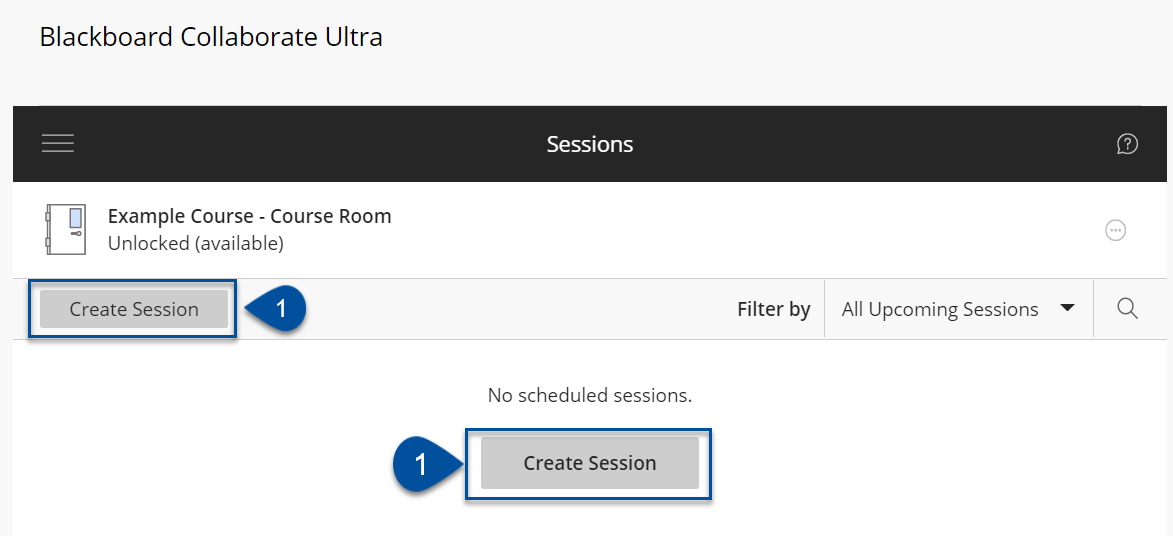
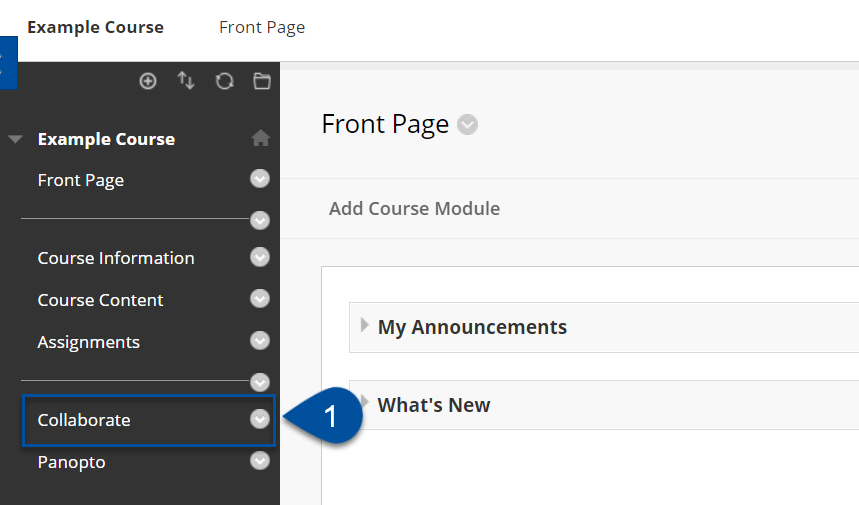
- Go to the Collaborate tool by clicking on Course Management > Control Panel > Course Tools > Blackboard Collaborate Ultra. Then click on Create Session.

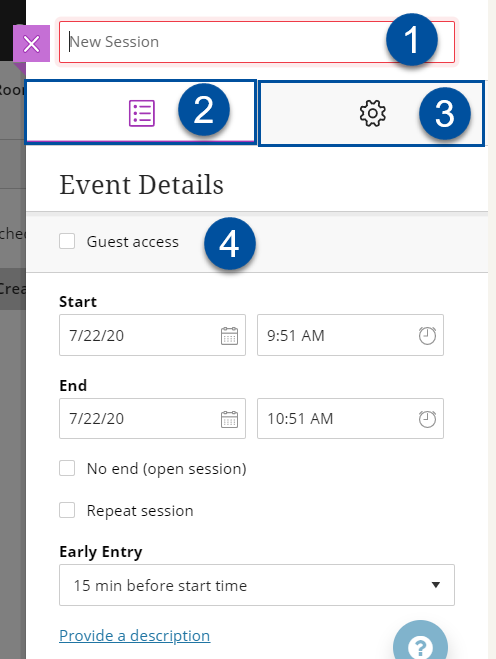
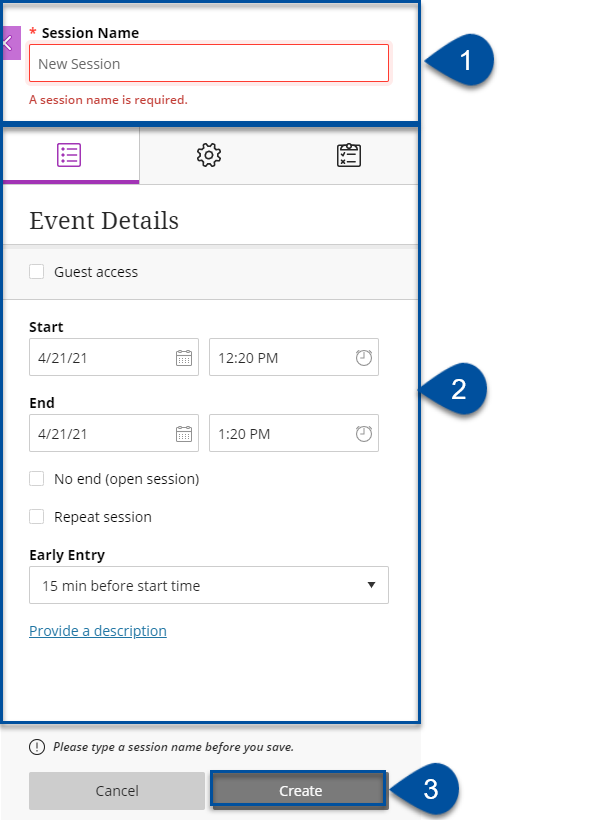
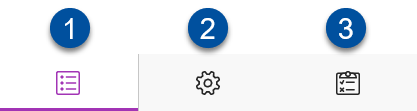
A side window will appear on the right. - Write the name of the session in the box New Session (1). Event details (2) and Session setting (2) are separate. You are automatically in event details after clicking new session. Remember to change over to session setting once you have filled out all event details.

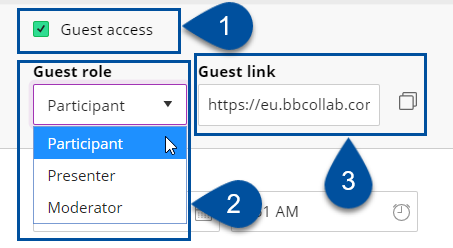
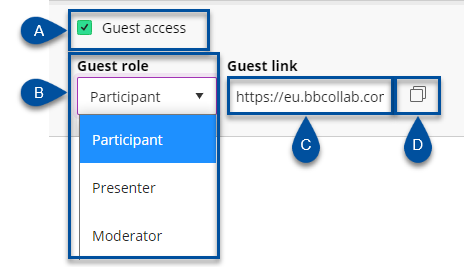
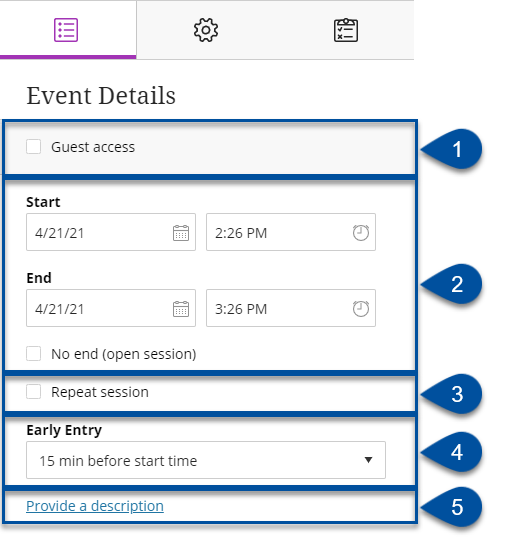
Allow for guest access will make it possible to invite people without affiliation to the course to participate. For each session a URL will automatically be created, which can be shared outside of Blackboard. This happens once you tick off the box Guest access (4). The URL can be shared example through exam to external people you wish to give access to.
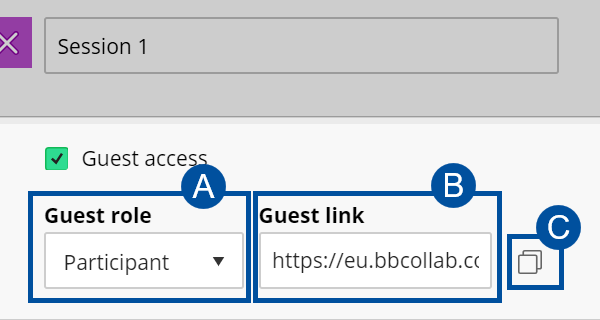
- Click on the session you wish to share. In the details you click on Guest access (1).
- Under guest role you choose which role the people will come in to the session as. You can choose between moderator, presenter or participant.
- In the text box to the right a Guest link (3) will appear. Note: you have to save the details in order to see the link. If you choose to change the guest role, the link will automatically accommedate this.
- To copy the link click on the icon with two windows (4) to the far right. Now you can send the link to the desired people, example through an e-mail.

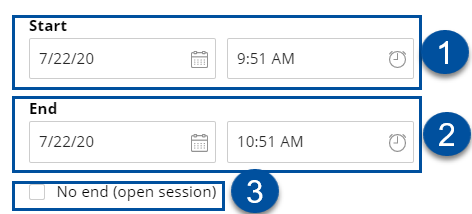
- Choose a date for when it should start (1) and when it should end (2). If you don't want to specify an end date, simply check the mark for No end (open session) (3).

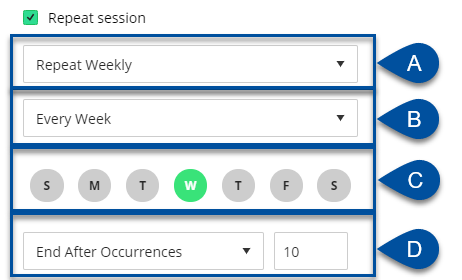
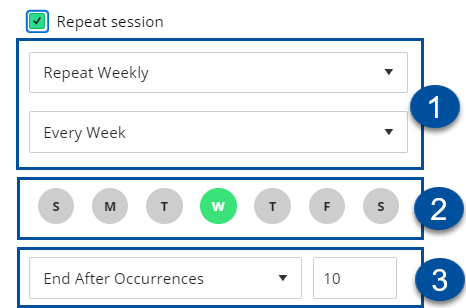
- If you wish to repeat the session on a later date, check the Repeat session box. You then have to decide if the session should be repeated daily, weekly or monthly (1). On which day(s) the session should occur (2), and when the sequence should end (3).

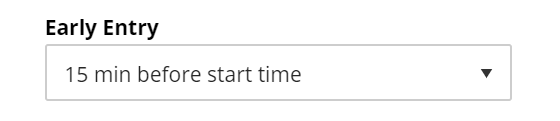
- Under Early Entry you choose whether students can join the Collaborate room before session start.

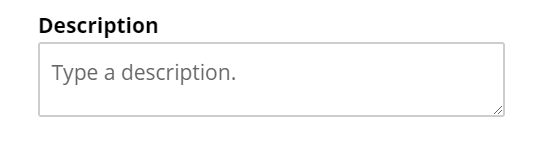
- It can be practical to give the session a Description. That way, students can more easily find the correct session.


Now all the Event details have been filled out. Please klick on Session Settings, here you decide what a participant can and can't do during a session.
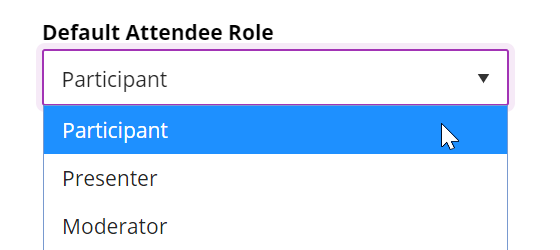
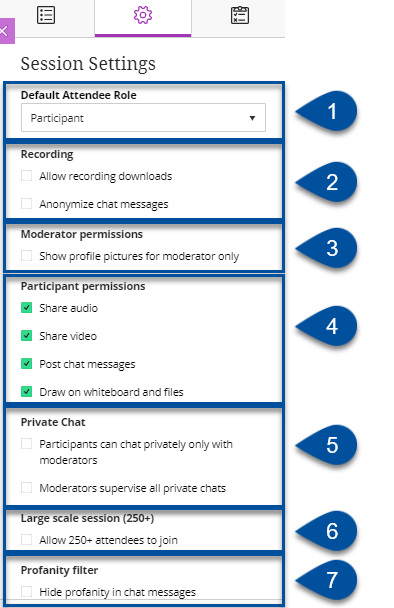
- Choose what sort of role a participant should be assigned when they join.

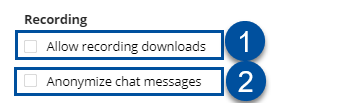
- Under Recording you can choose if the participants will be able to download a recording of the session after it has ended (1), and if the chat messages that were posted during the session should be shown as anonymous in the recording (2).

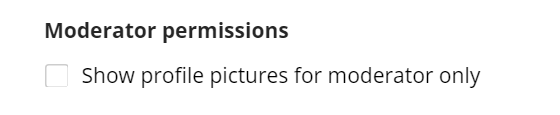
- Moderator permissions lets you decide if only moderators should be able to see profile pictures of participants.

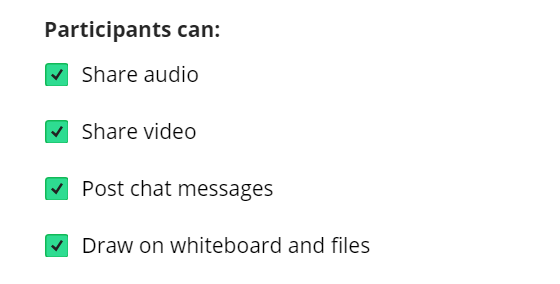
- Participants can lets you decide if participants can share audio or video, if they can chat during the session or draw on the blackboard.

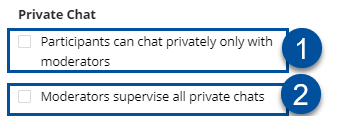
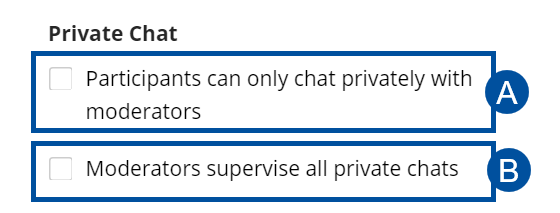
- Under Private Chat you choose if the participants only can chat with moderators (1), and if the moderators can see what happens in all private chats (2). (Note: Because of the data protection laws, it is important that you inform the students before the session starts if you decide to use the last function)

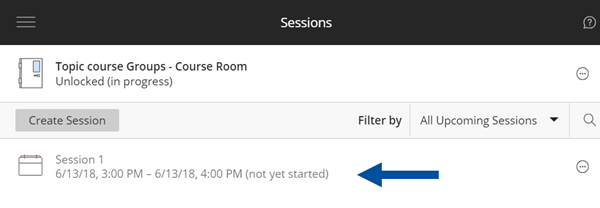
- When you are done defining the settings, click Save. You will then see that a new session has appeared in the list.

Change session settings
To change the settings of a session you only have to click on the session in the list. You will then see the same settings window as when you created the session.
Generate reports
Reports includes information on:
- How many participated in a session
- The average number of participants in the session
- Who participated
- What role they had
- How long they were active in the session
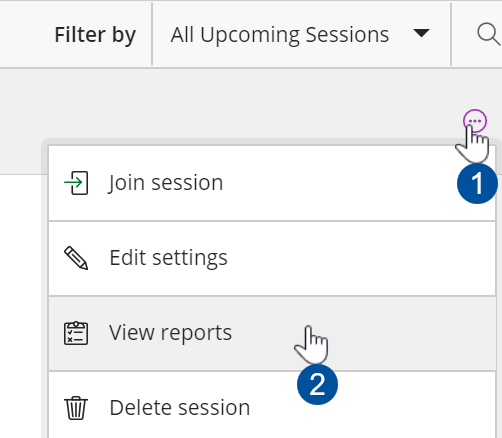
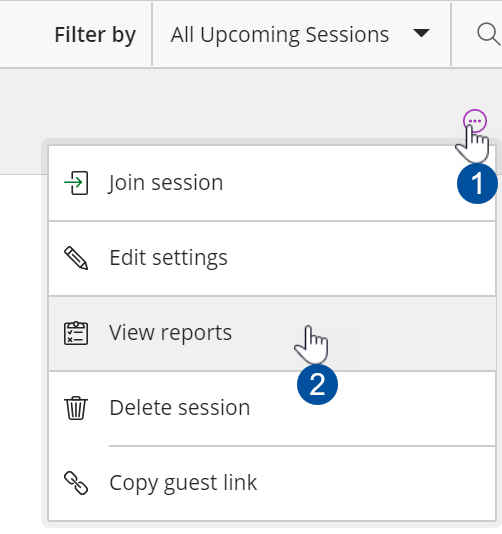
- Go to the Collaborate tool to see the list of sessions.
- Choose the session you want a report on. Click on Sessions options (1) and View reports (2).

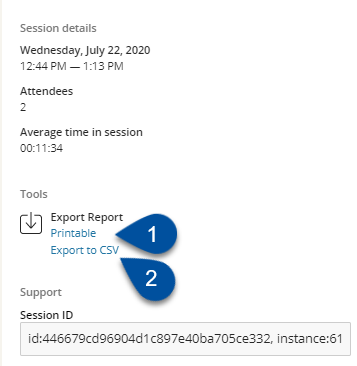
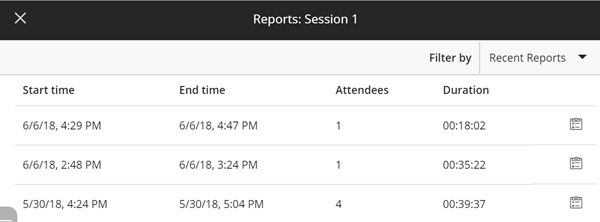
- You will then see an overview of all available reports belonging to that session. Reports plural, because a session can consist of multiple sessions.

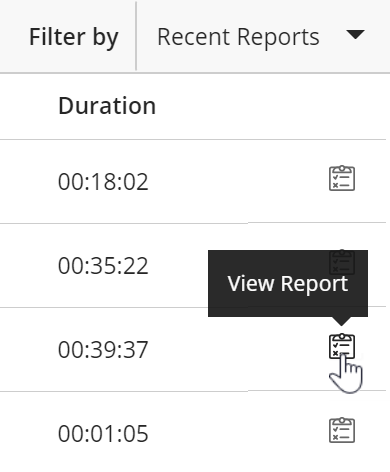
- To see a report, click on the clipboard icon belonging to that session.

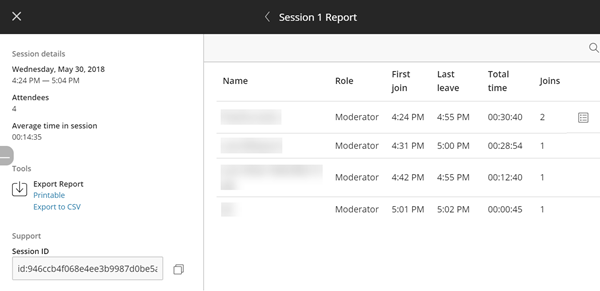
On this page, you can see all the details in the report.
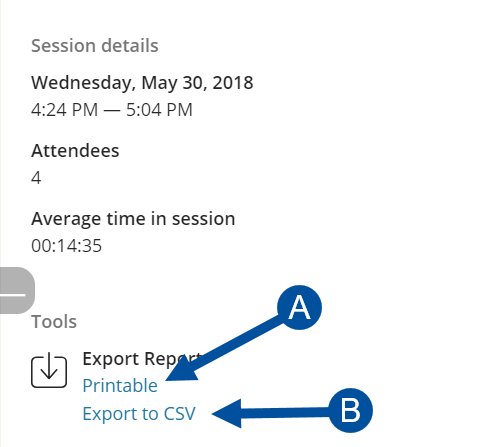
- A report can also be made into a single HTML-page that can easily be printed (1), or downloaded as a CSV-file (2).

See Also
- Blackboard - Introduction to Collaborate
- Blackboard - Tools in Collaborate
- Blackboard - Recommended practice in Collaborate
Contact
Orakel Support Services can help if you have questions or if you encounter difficulties.