Blackboard - Record feedback to students - Kunnskapsbasen
Blackboard - Record feedback to students
In this user guide, you will find information about how to record feedback to students in Blackboard in the Grade Center.
Norsk versjon - Gjøre opptak av tilbakemelding til studenter
Innholdsfortegnelse [-]
Topic Page Online teaching | Topic Page Blackboard
Recording feedback
You can embed audio or video recordings with your feedback when you grade attempts in the grade center. Students can watch or listen to your feedback next to any text you include.
Recordings can help you connect with students in courses with little to no face-to-face communication. Combining video and audio recordings with feedback in text format, can help provide students with useful, actionable, and more personal feedback regarding their submissions.
At this time, feedback in audio and video format is not supported for grading rubrics. Not all browsers support this feature. You should use Chrome or Firefox for the best user experience.
Make recordings
Feedback recordings are unique to each student's submission. You cannot download, share or reuse recordings created in the feedback editor.
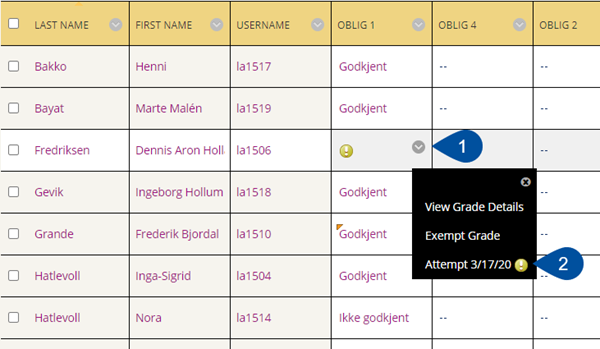
- To start grading, enter the Grading Center and fin the submission you want to give feedback on. Click on the grey circle (1) behind the submission, and select Attempt dd.mm.yy. (2). You will now come to the Grade Details page.

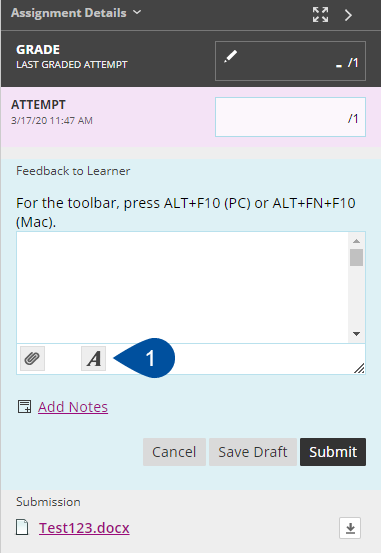
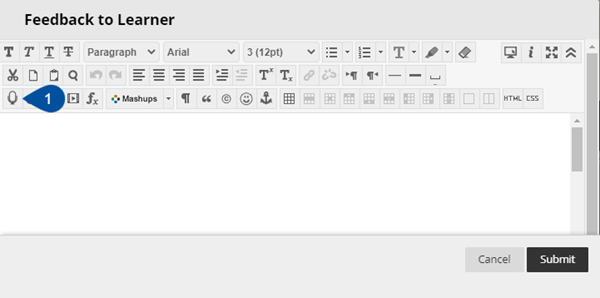
- To be able to record your feedback, select the icon represented by the letter A (1) at the bottom of the Feedback to Learner box. The editor opens in a pop-up window.

- In the Feedback to Learner window, select the microphone icon at the bottom left of the word processing tool. A new window will now open.

- The first time you open the recording window, you must give your browser permission to use audio and video. In the box that appears at the top left, asking you to allow Blackboard to use the microphone and camera, click Allow (1).

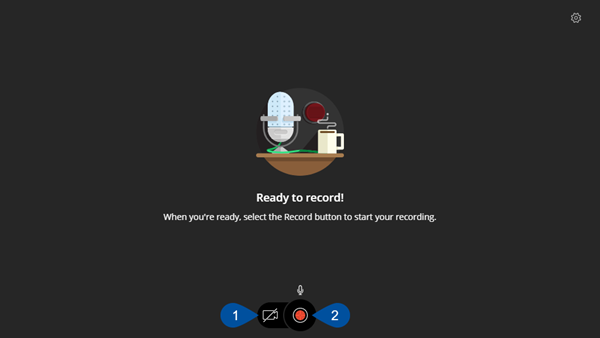
- In the recording window, click on the camera icon (1) in the recording interface to enable the camera. If the camera is not activated, the tool only records audio when you start recording. When you are ready, click the Record button (2) to capture audio and video feedback.

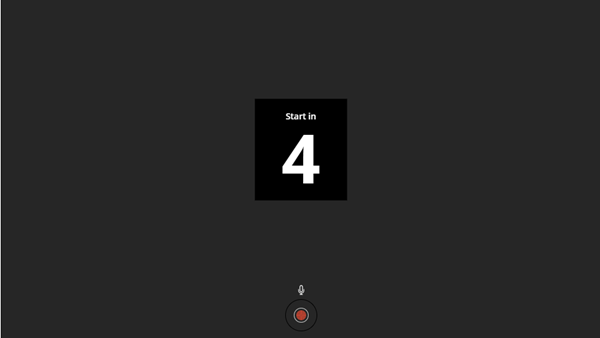
- Get ready to record while the tool counts down. You can make recordings that last up to five minutes.

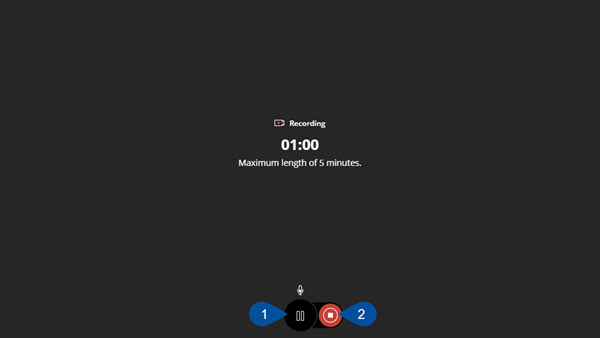
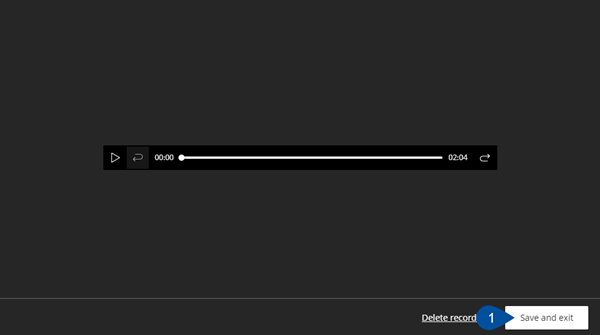
- Select Pause recording (1) to stop and resume recording the feedback, or select Stop recording (2) to review the recording and save or discard it. If you want to re-record the feedback, you can delete the recording and start again.

- Select Save and exit (1) if you are satisfied with the recording and want to share it with the student.

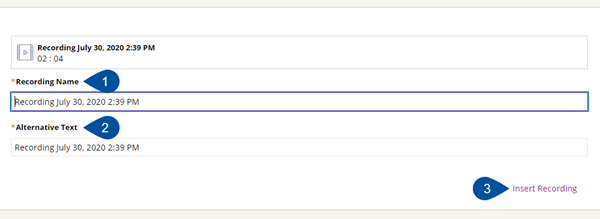
- Next, rename the recording (1) and add alternate text (2) to make it accessible to all users. By default, the system uses the time and date of the recording for these fields. Select Insert recording (3) to complete the process and insert the feedback into the editing tool.

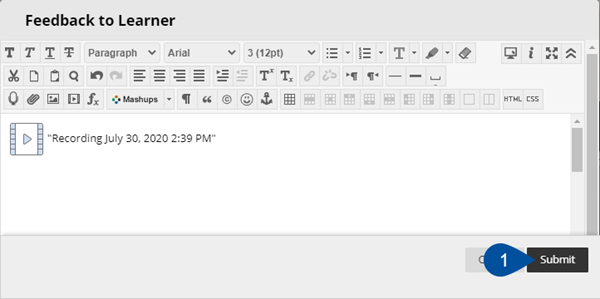
- The recording will now be added in the Feedback to Learner window. Press Submit (1) to add the recording to the Grade Details page.

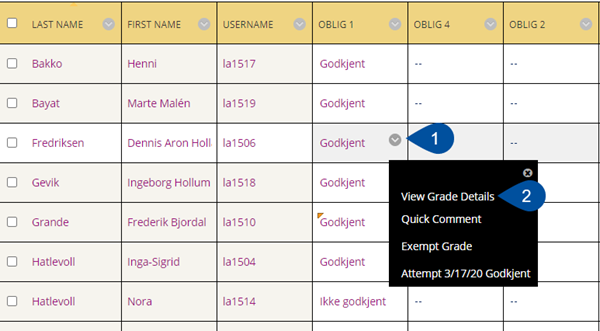
- To access the recording you have sent to a student, enter the cell of the student in question in the Grade Center, click on the grey circle (1) behind the graded submission and select View Grade Details (2).

Recording files
Recording files are not included in course archives and backups, though the file association is retained. The recording should appear within the data retention window when the course is restored on the same Blackboard Learn system. Contact your administrator for more specific information about data retention at your institution.
See also
- Blackboard Help Page - Grading
- Blackboard - Overview of the grade center
- Blackboard - Organizing the grade center
- Blackboard - Assessing course work
Contact
Orakel Support Service can help you if you have questions or encounter difficulties.