Blackboard - Creating and editing announcements - Kunnskapsbasen
Blackboard - Creating and editing announcements
This page shows you how to create and work with announcements in Blackboard.
Norsk versjon - Opprette og redigere kunngjøringer
Topic page Blackboard | Pages labeled with Blackboard
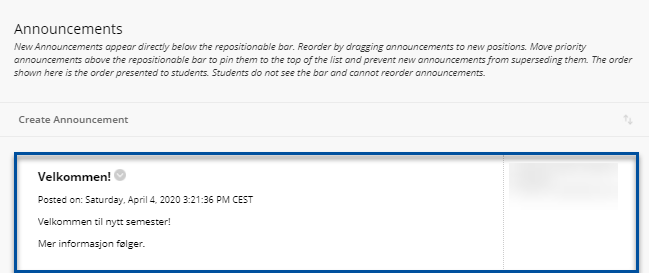
If you need to notify your students about anything, announcements is a good way of doing this. The students will receive a notification in Blackboard when you post a new announcement, and you can also choose to send the message as an email in addition. You can link to attachments and course content in your announcements. After publishing, you can edit, delete or pin the announcement.
Navigating to the announcement-tool
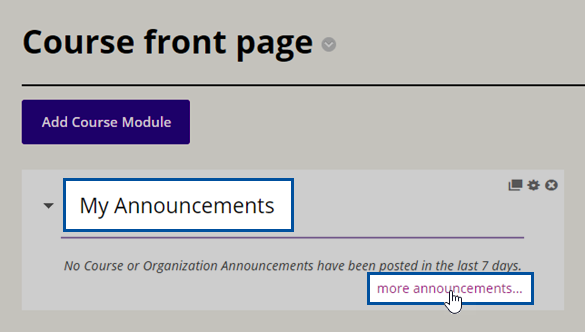
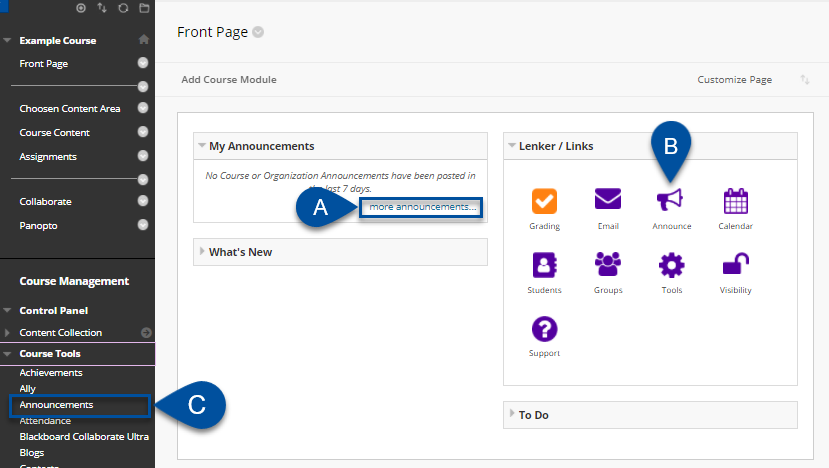
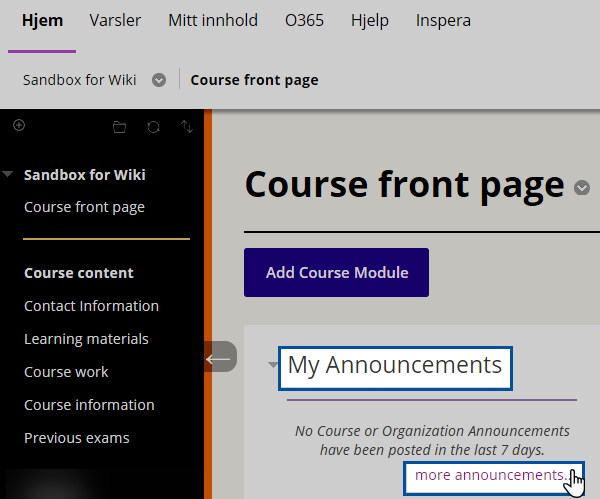
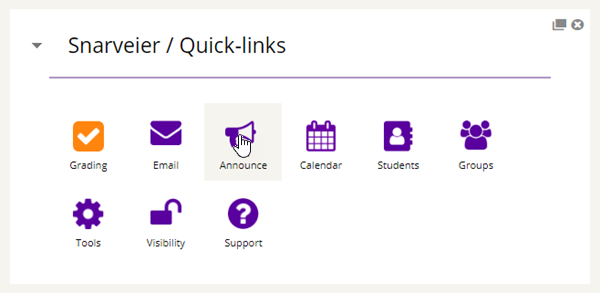
You can find the announcement-tool in several different ways:
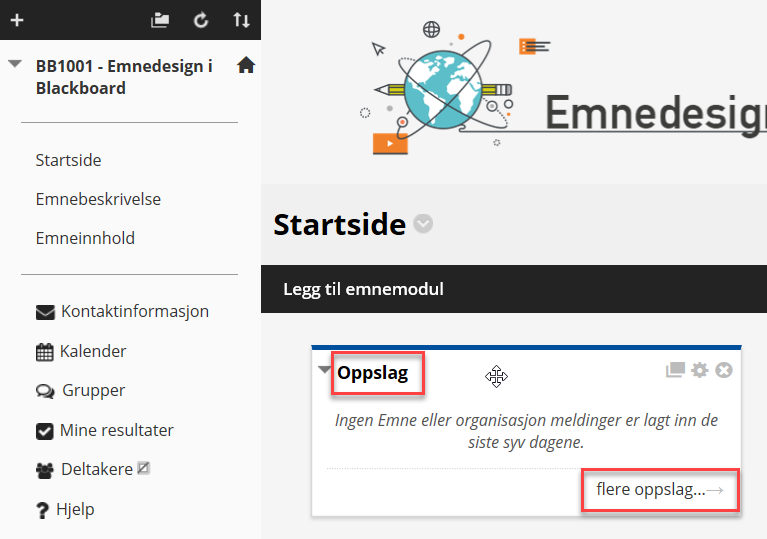
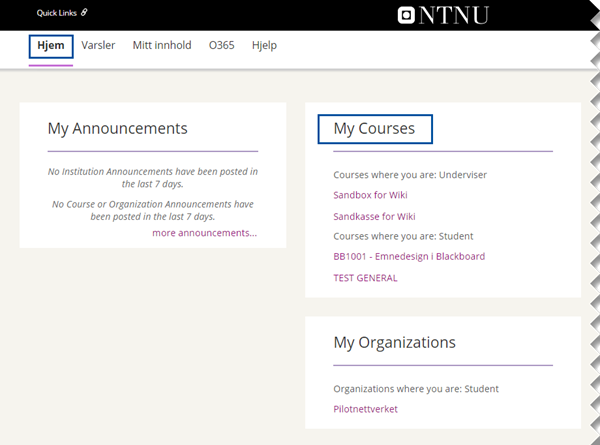
- On the course front page there is a module called My Announcements. Click more announcements to see all announcements in the course.

- This page can also be found by clicking Announce under Quick-links on the course front page.

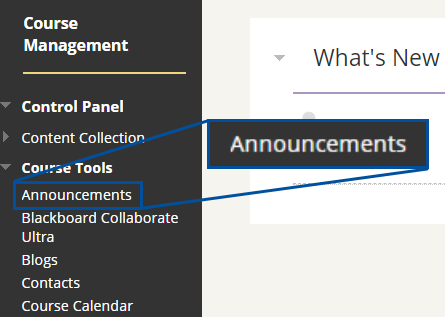
- You can also find a link to the announcement-tool under Course Tools.

Creating announcements
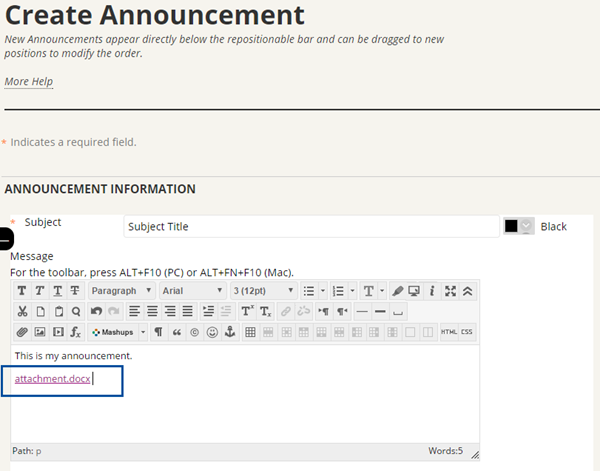
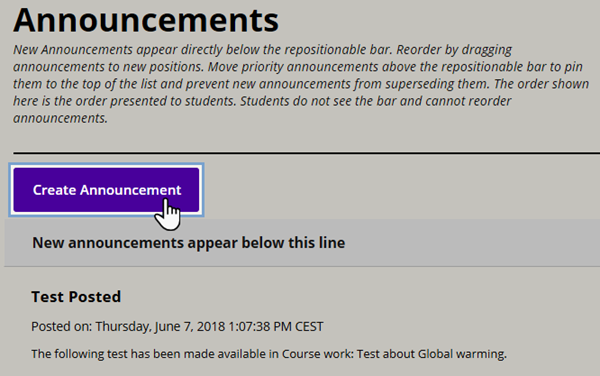
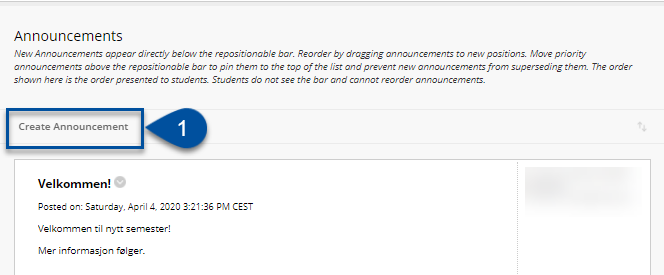
- Click on Create announcement to start.

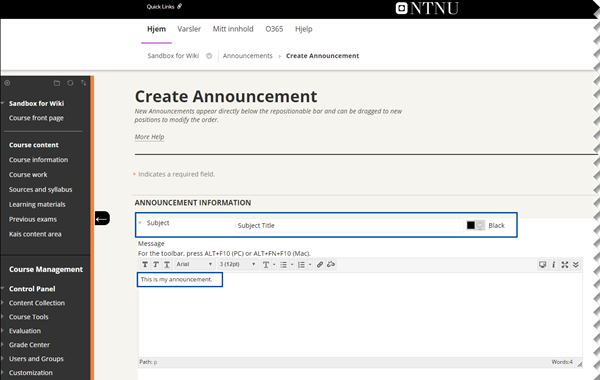
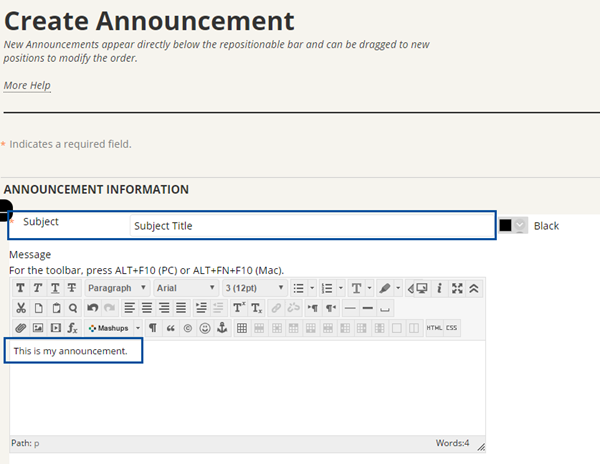
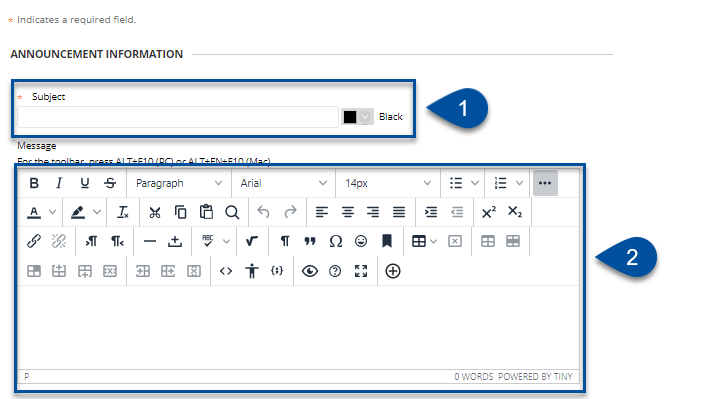
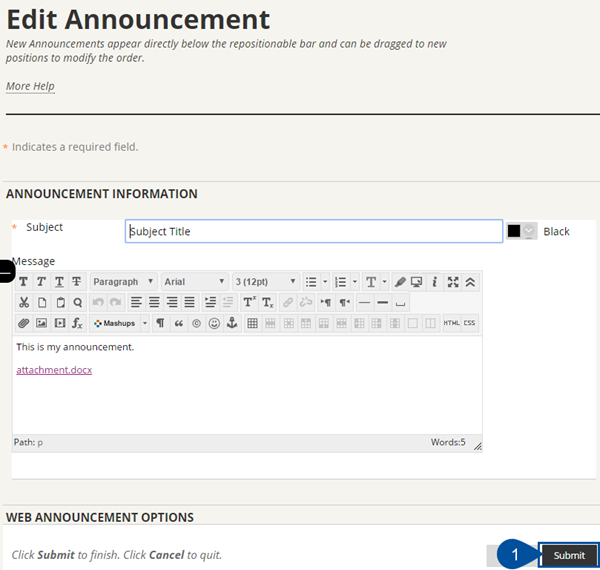
- You have now entered the editor. You have to give your announcement a Subject, and you can write your announcement in the text editor below.

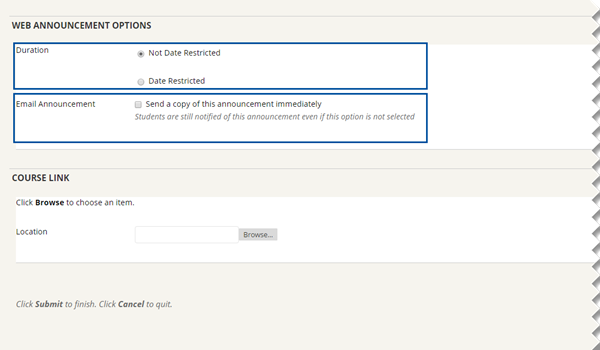
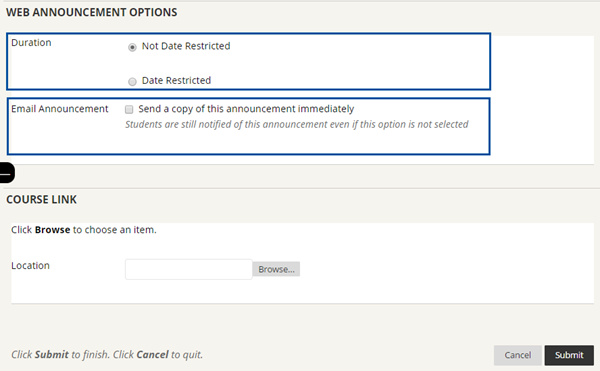
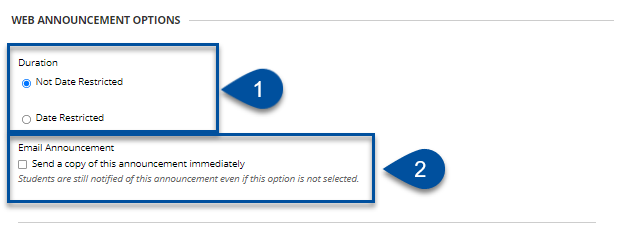
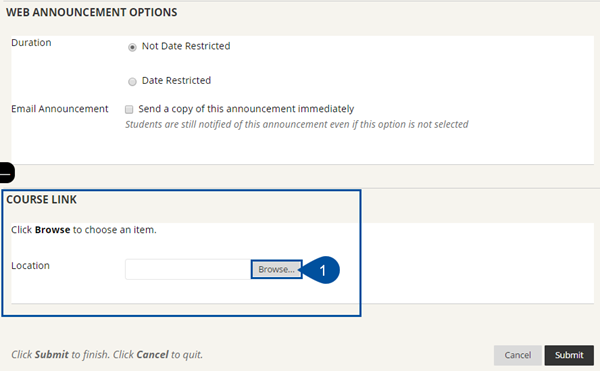
- Under Web announcement options, you can choose whether the announcement should disappear on a certain date or not - Date restricted under Duration and you can choose to send the announcement as an email to all course participants.

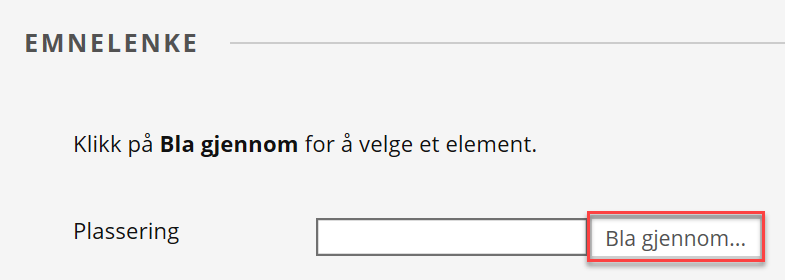
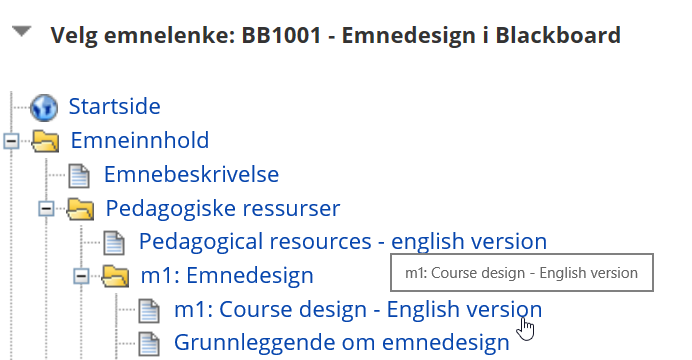
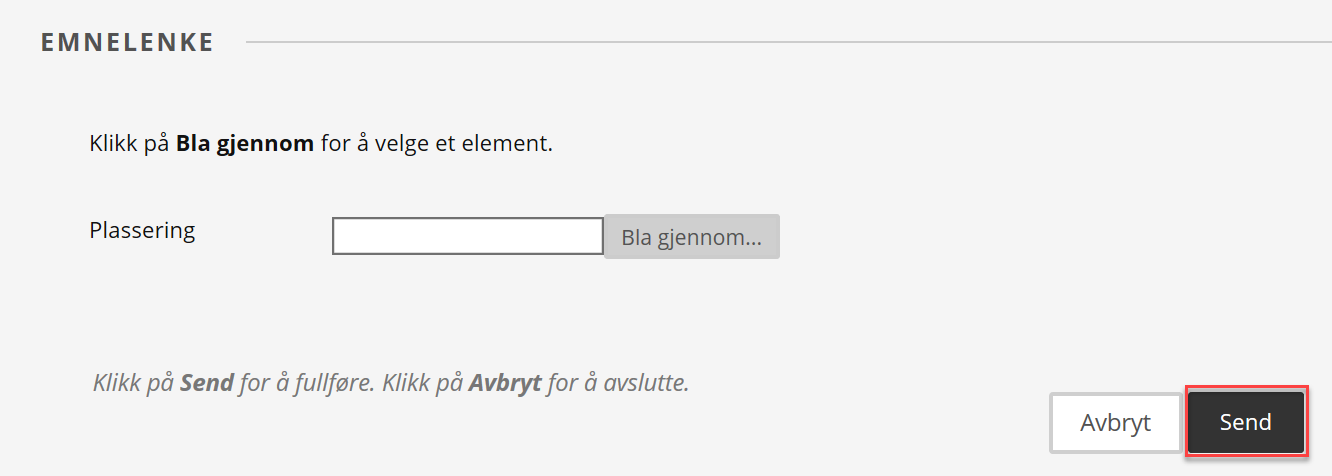
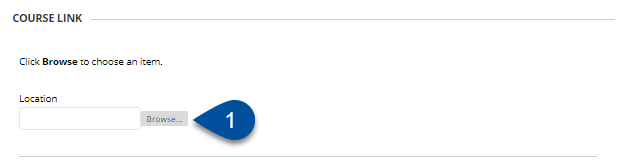
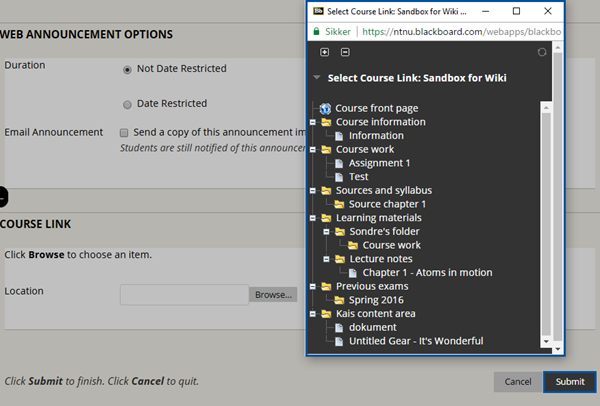
If you choose not to send the email, the students will still be notified about the announcement within Blackboard. You can also choose to send the email later. - If you would like to add a link to an course item, you can do so when you scroll down to Course link. Click Browse to choose an item. Choose the item you want from the window that pops up. This is optional.


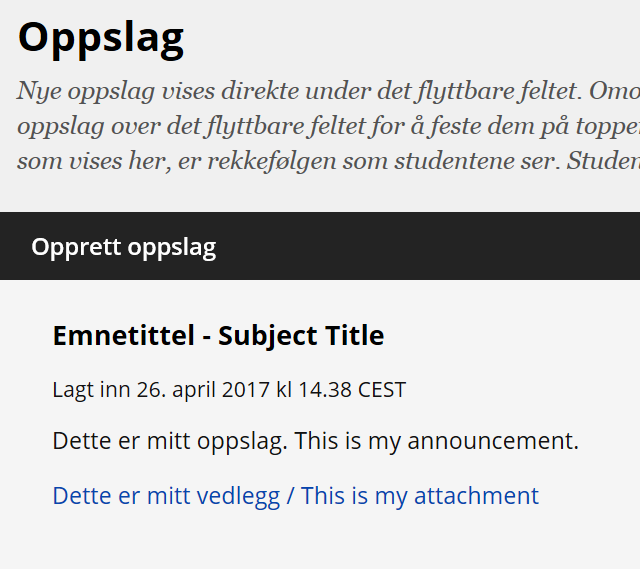
- To finish the announcement and publish it, click Submit. Your published announcement will appear on the announcement page.

Adding an attachment to the announcement
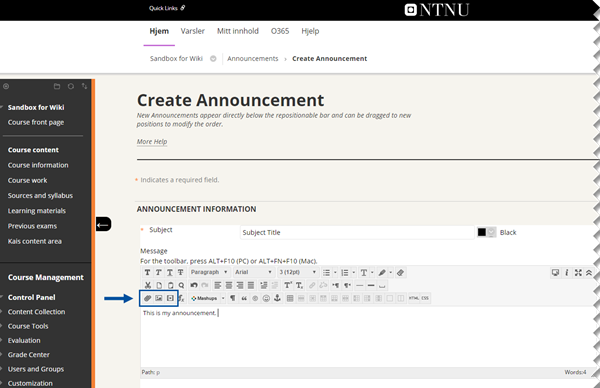
If you want to add an attachment to the announcement, you can do so by using the toolbar. You can add files, pictures, videos and more.
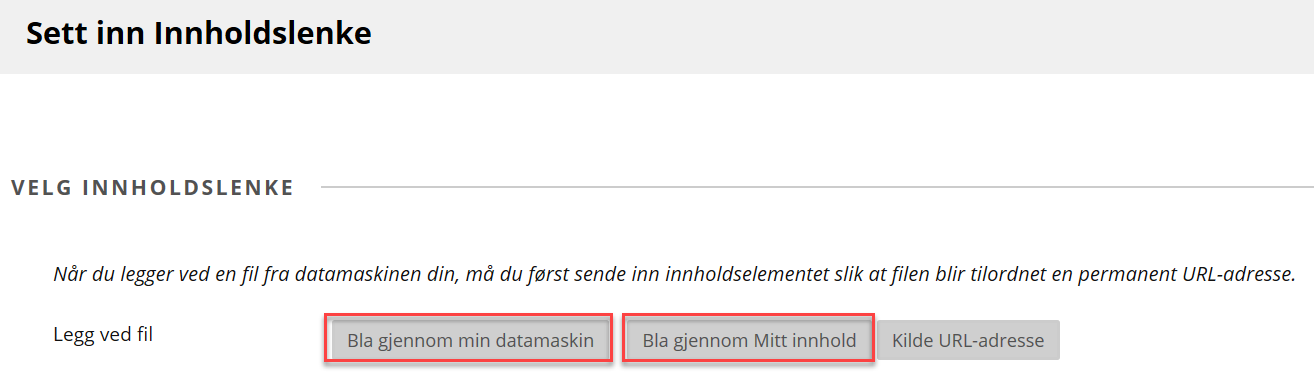
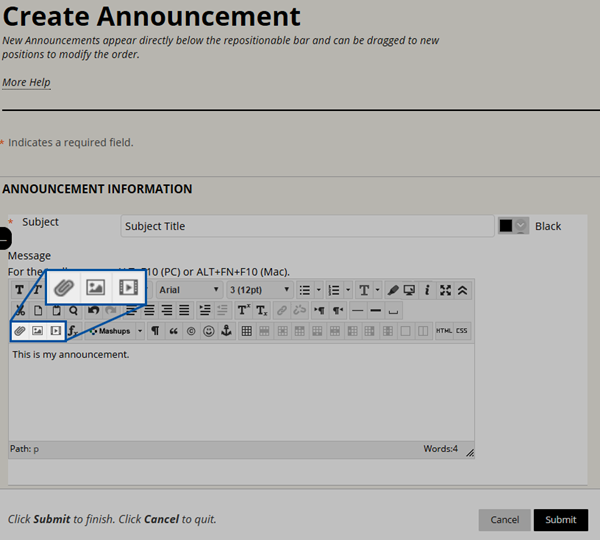
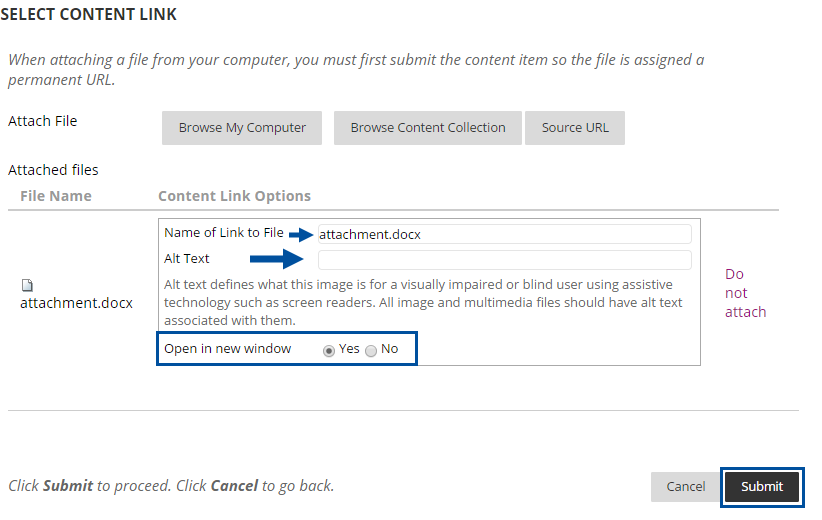
- Click on Browse My Computer to add a file from you computer or click on Browse Content Collection to add a file from your content collection in Blackboard.


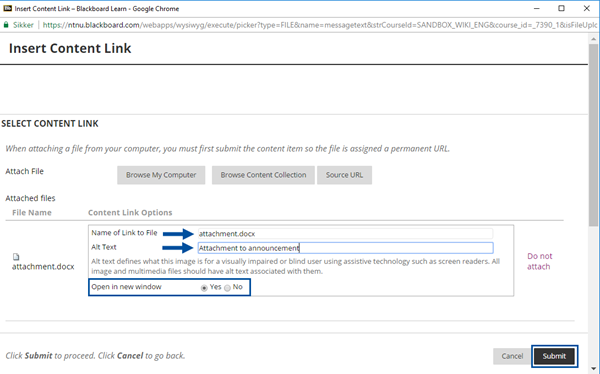
- When you have found the file you would like to attach, you can choose a name for the link to the file, and add an alternavite text defining what the attachment is so that visually impaired users using assistive technology can find out what it is.

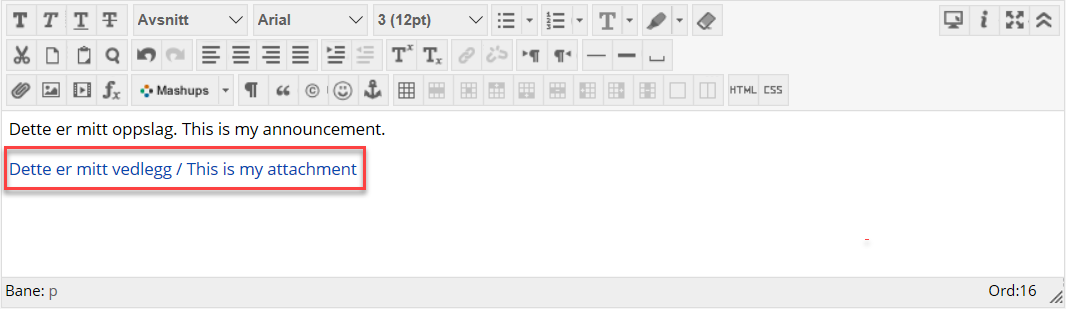
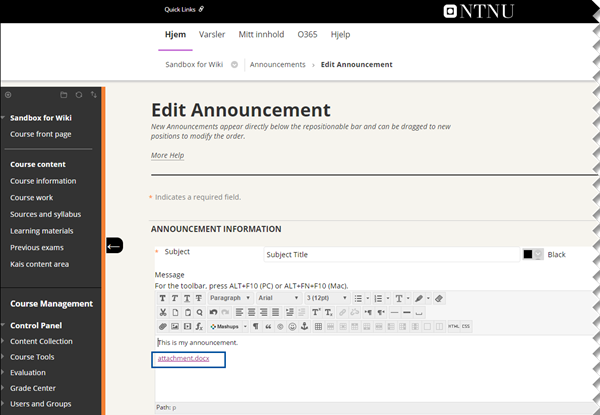
It is recomended to always open links in a new window. Click Submit when you are done. - The attachment link will appear in the text editor. You can move this within the text if you want to.

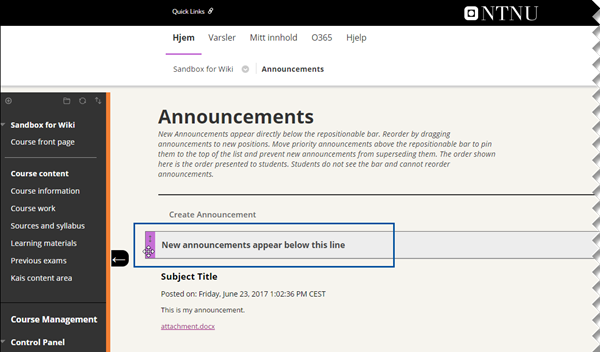
Pinning announcements
If you want an announcement to stay at the top of the page even after you create new announcements, you can pin it. When you are on the announcements page, you will see all the different announcements made in the course along with a line that says New announcements appear below this line.
You can move this line up or down by clicking on it, moving it. If you leave it above all the announcements, all new announcements will push the older ones down. If you leave it below an announcement, all new announcements will appear below it, keeping the one you chose at the top at all times. You can always change this if you want to and also change the order of all the announcements.

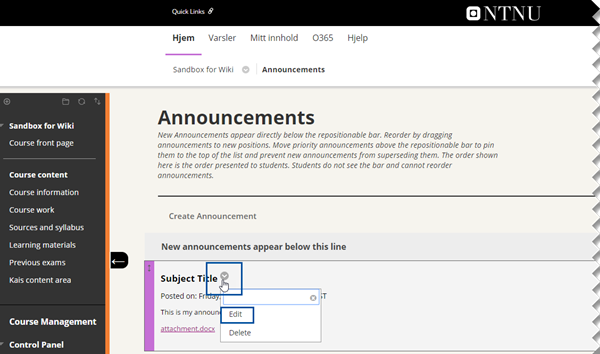
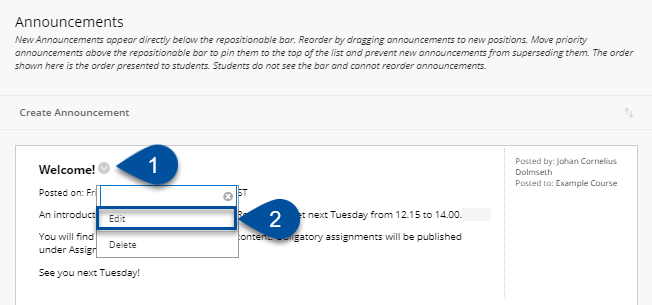
Editing announcements
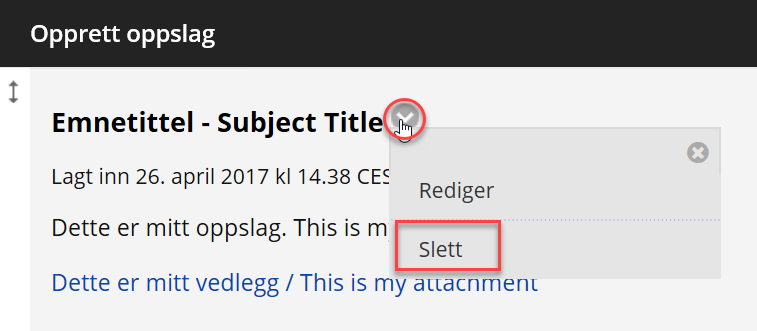
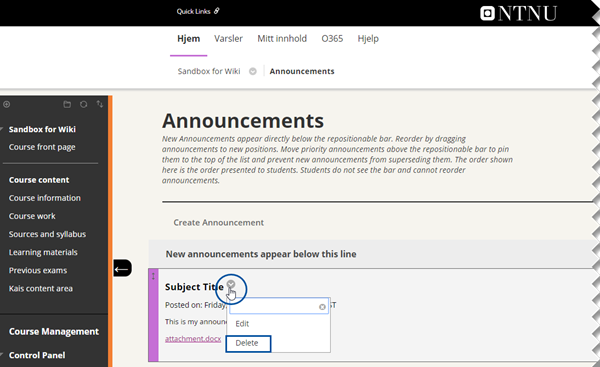
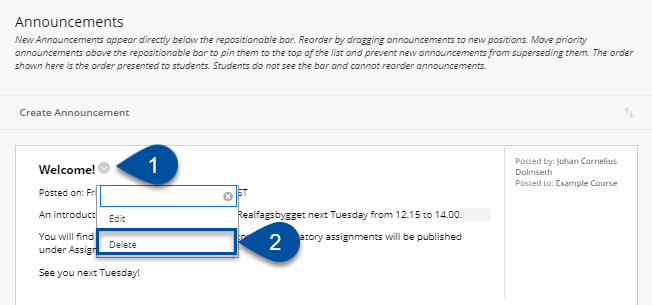
If you would like to edit your announcement, hover over the announcement and click on the arrow that appears. Click on Edit to start editing the announcement.

You have now entered the editor again and you have all the same options for editing the announcement as you did when you created it. When you have finished editing, scroll down and click Submit to save and publish the changes.

Deleting announcements
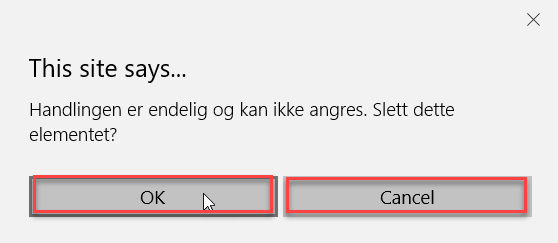
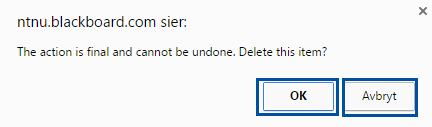
If you would like to delete your announcement, hover over the announcement and click on the arrow that appears. Choose Delete. You will be notified that deleting the announcement cannot be undone and asked if you still want to delete it. Press OK to delete or Cancel to keep the announcement.


See also
Contact
Orakel Support Services can help if you have any questions or difficulties.