Blackboard - Courses and organizations - Kunnskapsbasen
Blackboard - Courses and organizations
This article explains the difference between courses and organizations, as well as giving an introduction to the usage and functionality of organizations. Additionally it shows how you may add users to an organization, either manually or by exporting students from a course.
Norsk versjon - Emner og organisasjoner
Topic page about Blackboard | Pages labelled Blackboard
Locating courses and organizations
When you log onto Blackboard you will see the main menu on the left side. In this menu you will find My Courses (1) and My Organizations (2). 
What is the difference?
Organizations have the same utilities as courses and contain tools for the members to communicate efficiently. You can publish information, participate in discussions and share documents. Organizations is an ideal solution for making contact with other users who do not share your courses, e.g. interdisciplinary project groups. Courses and organizations both share the same tool availablities, such as groups, discussion board, wikis, blogs, etc.
Key differences between courses and organizations
- Organizations are not displayed in the students' Blackboard app.
- Organizations are created through requests to the faculty administration.
- Courses are created for each course code. The students are added automatically to the course once they are registered for teaching in Student Web.
- Organizations, on the other hand, are only created by request. This could for instance be an interdisciplinary project that needs a common room for the participants in Blackboard.
How to request an organization
Requests can be placed by employees at NTNU.
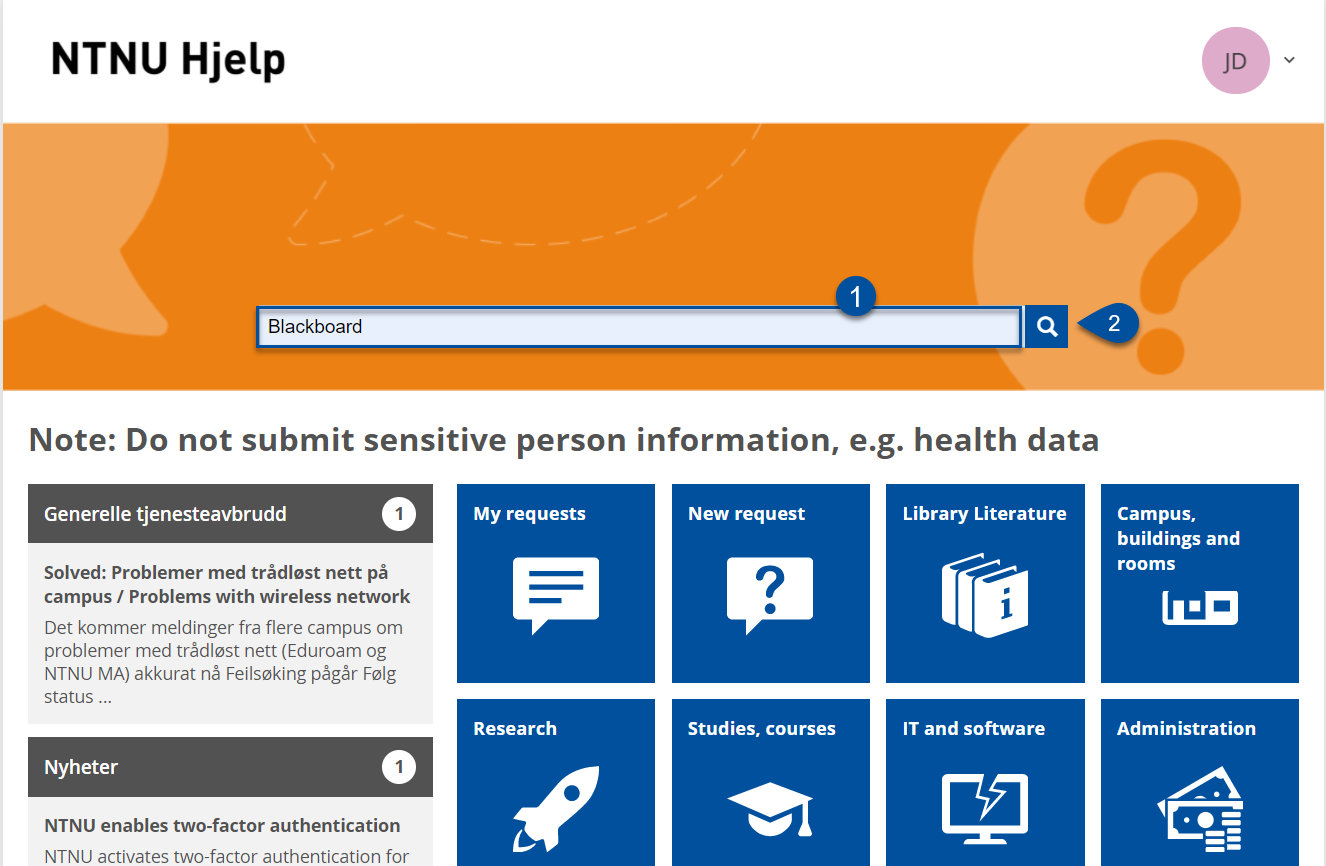
- Log onto http://hjelp.ntnu.no.
- Write Blackboard into the search area (1) and click the search icon (2).

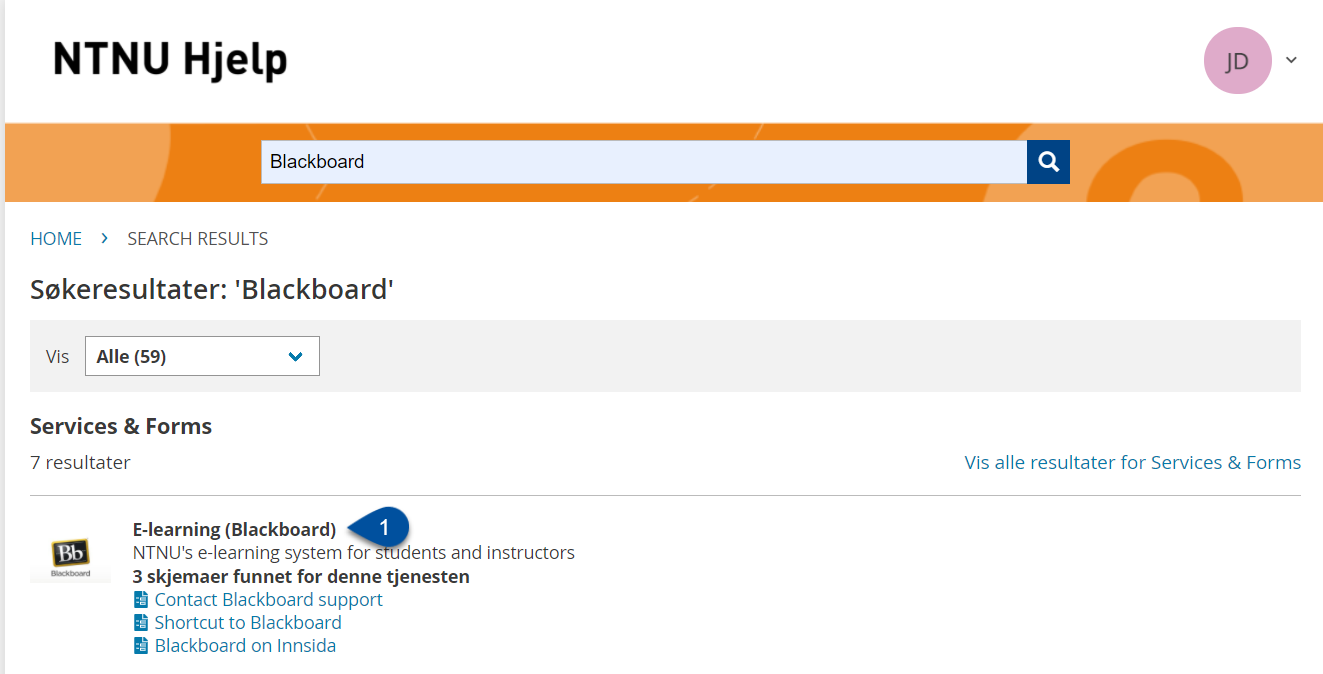
- Choose E-learning (Blackboard) (1).

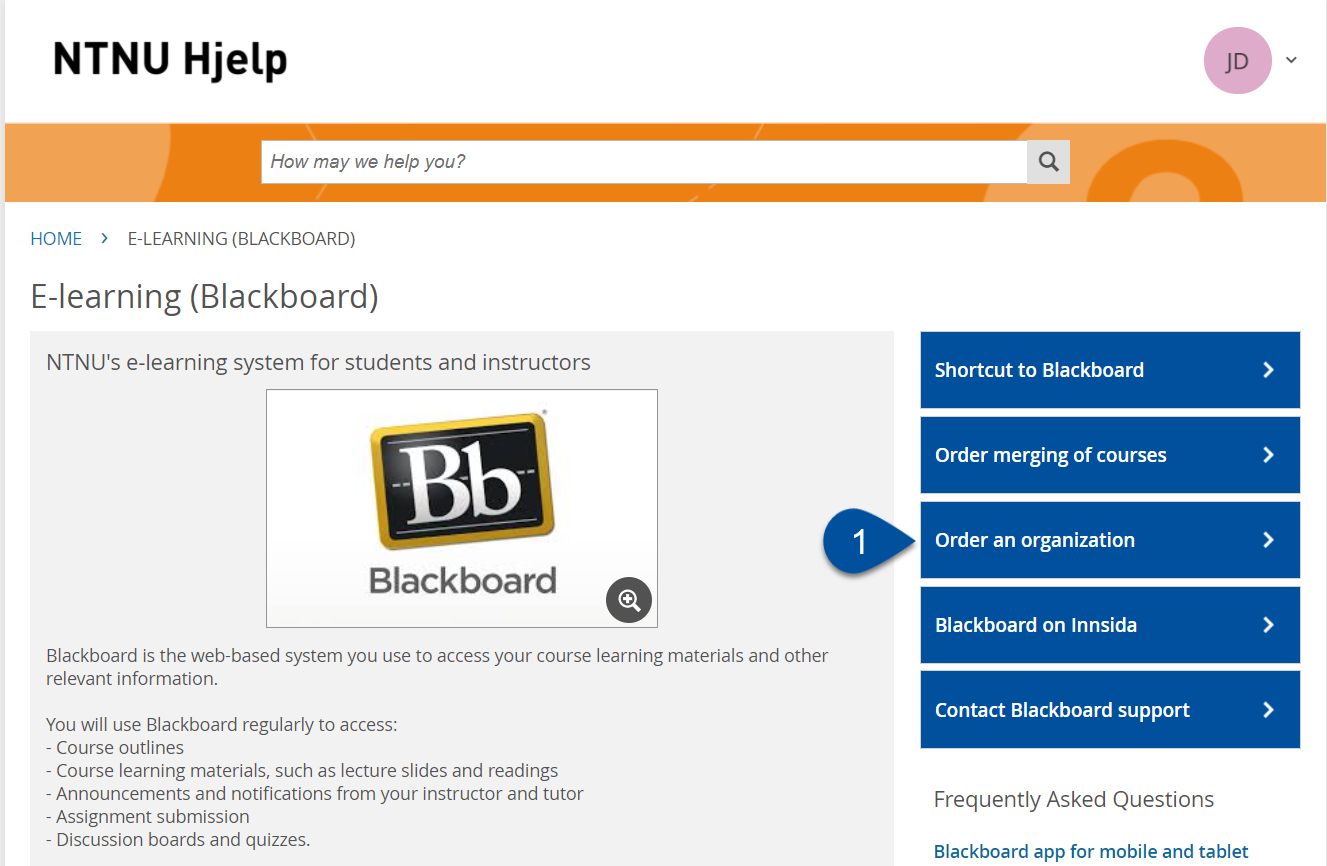
- Click Order an organization (1) and fill out the form
 .
.
Importing users to an organization
Users can be added to an organization by adding each user manually ("Adding the exported users to the organization" further down). You may also import several users to an organization from a course if you wish to add a group of students in one go. We will show how you can do this below.
Exporting users from a course
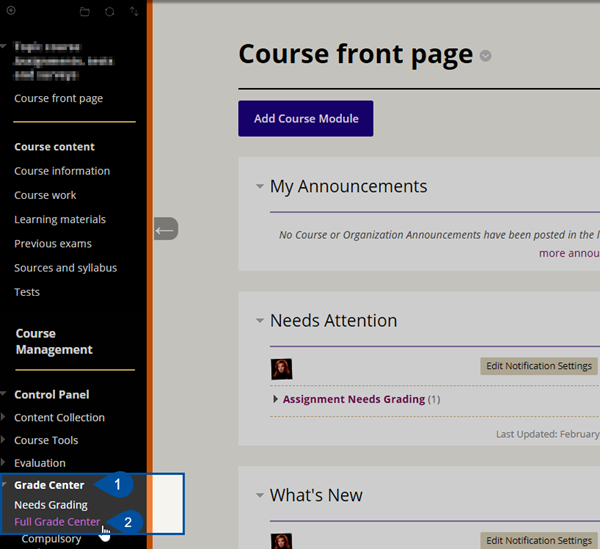
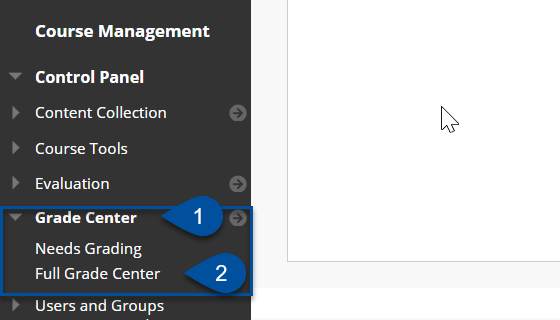
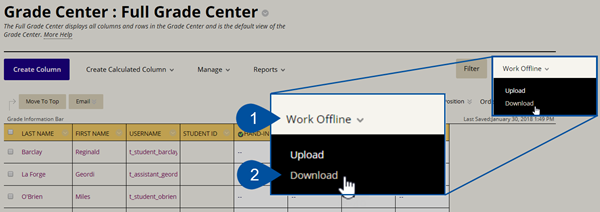
- In order to obtain a list of students from a course, we need to access the course's grade center. First, we open the button Grade center (1) and click on Full Grade Center (2).

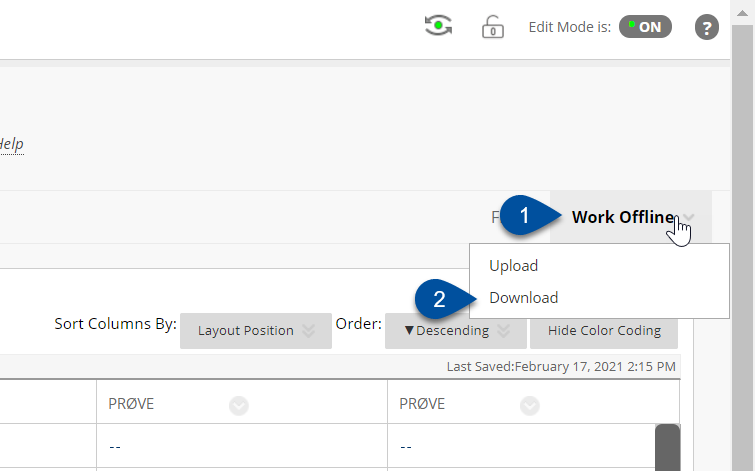
- Inside the grade center we move the cursor to the button Work Offline (1) og click on Download (2).

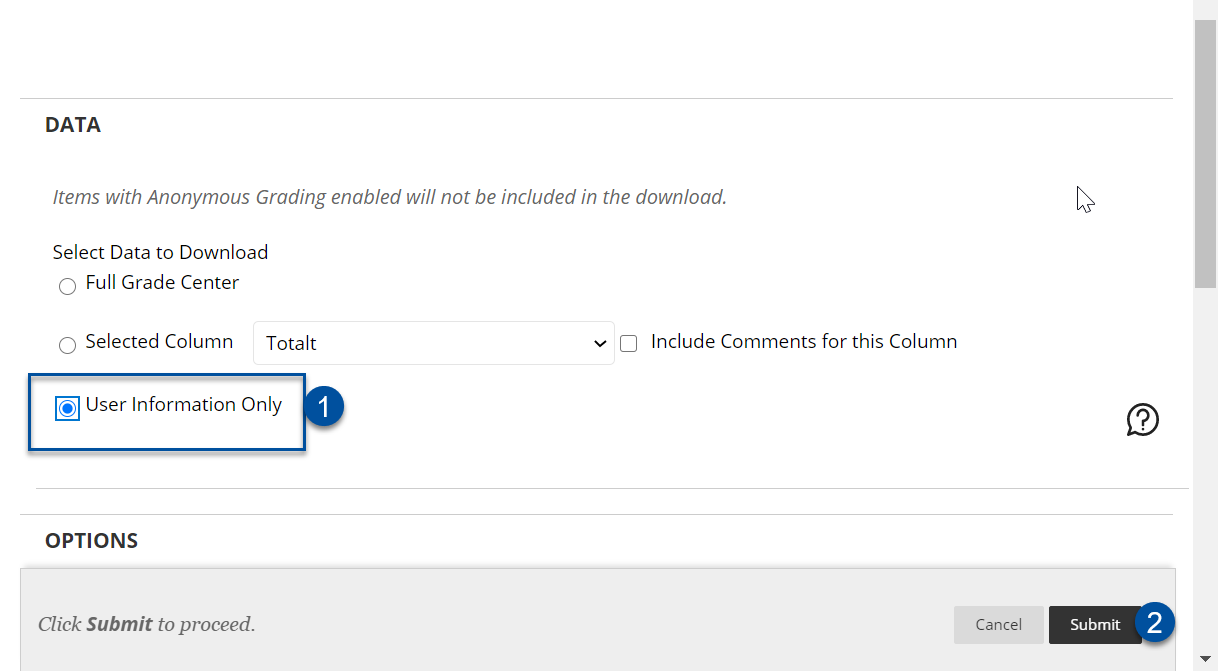
- We are then taken to a new page with download options. Here we will tick off the option User Information Only (1) and then click on Submit (2).
 .
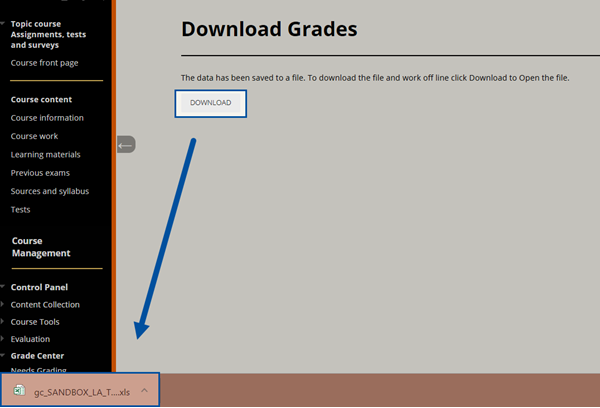
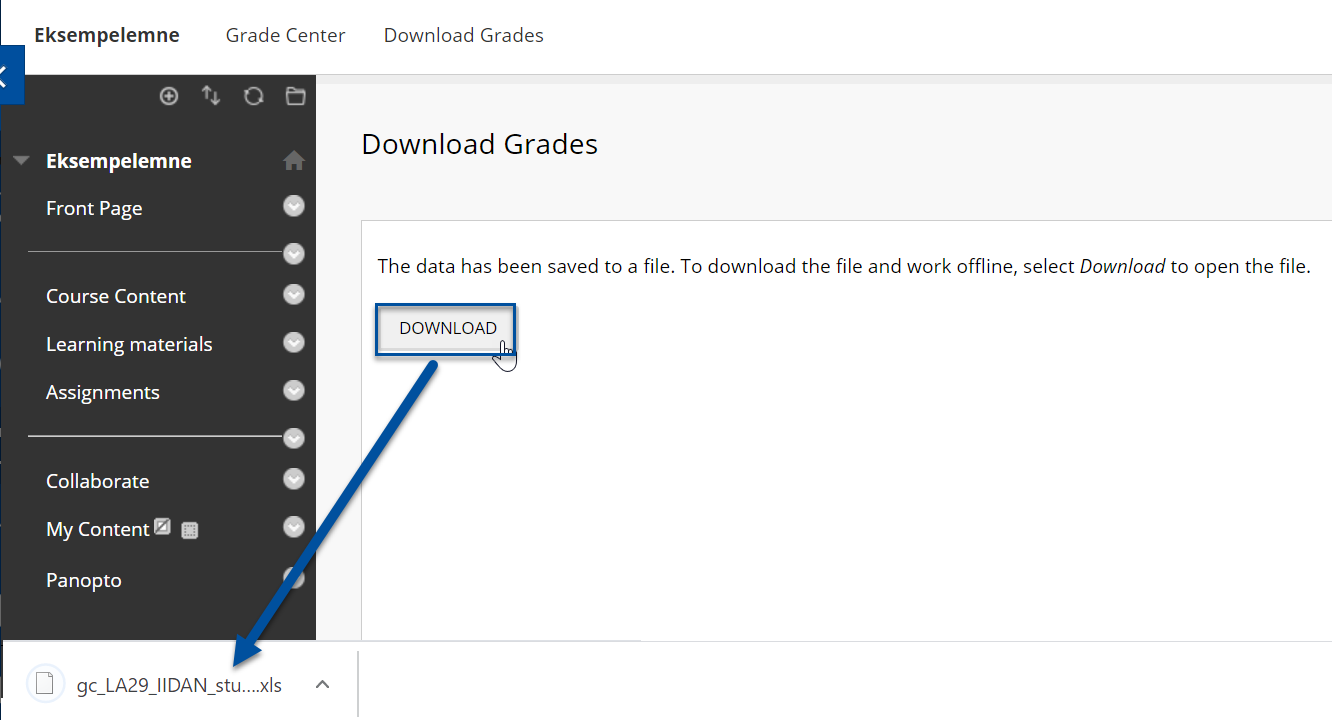
. - In the next window we will finish by clicking on DOWNLOAD.

Prepare the file for import
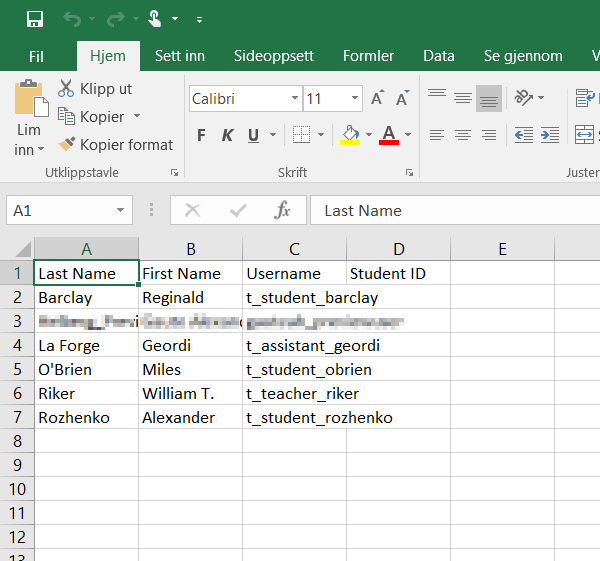
- The file will be downloaded as an .xls file. We will open this in Excel. It should then appear as shown in the image below.

- In order to extract the data we need, we will select the column containing the usernames and copy these (kopier).

- Then we will open an empty Word document, right-click and select the pasting option that says Keep Text Only. The reason for this, and not using the hotkey Ctrl+V, is that only this option will give us the correct formatting of the text.

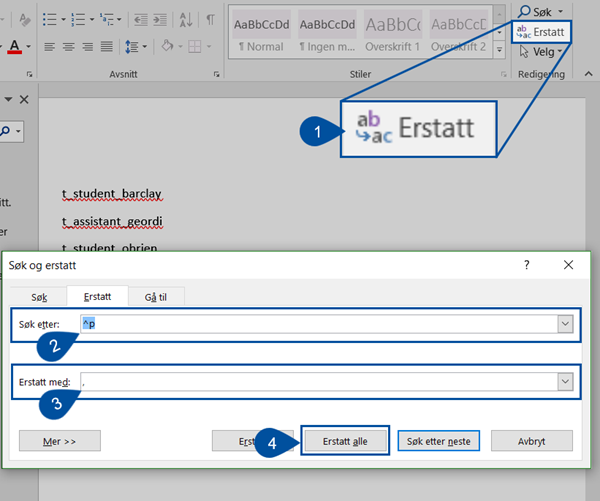
- Next, we will hit Ctrl+H (or use the Replace (Erstatt) button in Word (1)). A "search and replace" window will appear. In the search box we will type "^p" (2) and in the replace box we will type "," (3). This will replace all line breaks with commas. Click on Replace all (Erstatt alle) (4) to complete the action.

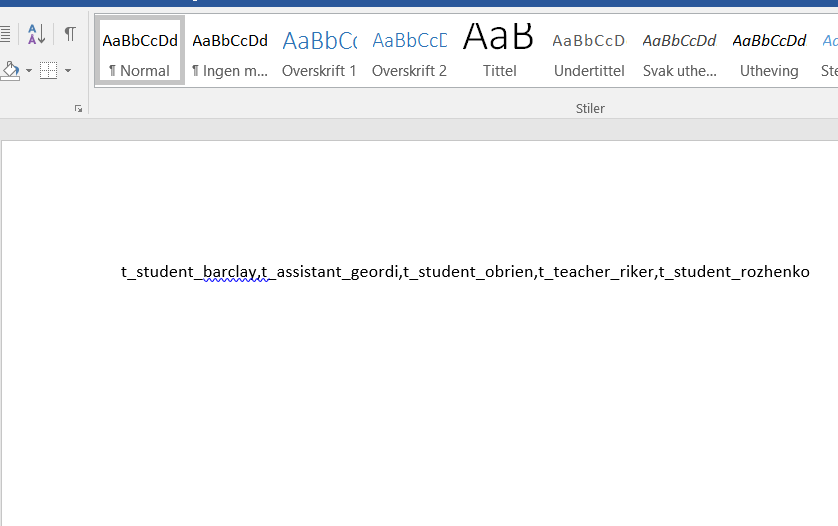
- The list should then look something like this, with usernames being separated by commas. We can now import it to the organization.

Adding the exported users to an organization
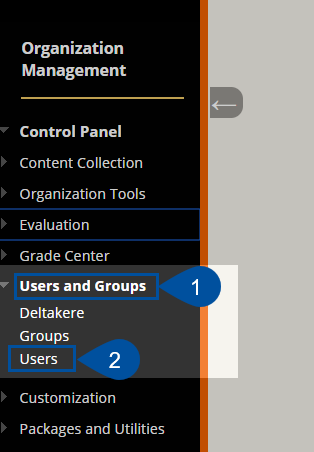
- In order to add these users to the organization, we first need to enter the organization and open Users and Groups (1) and then click on Users (2).

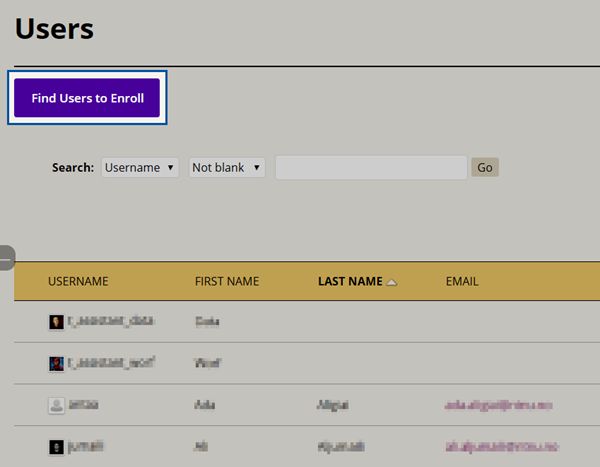
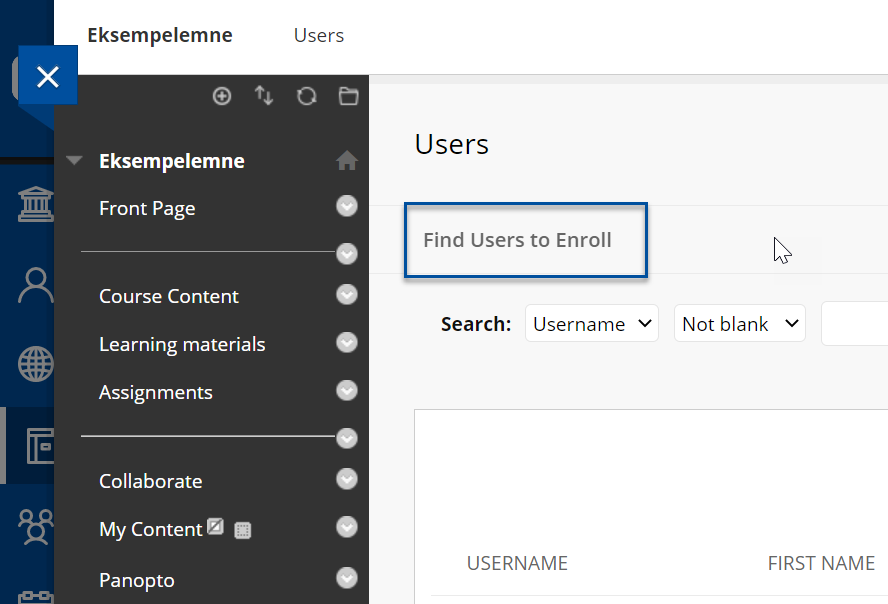
- In the following window we will click on Find Users to Enroll.

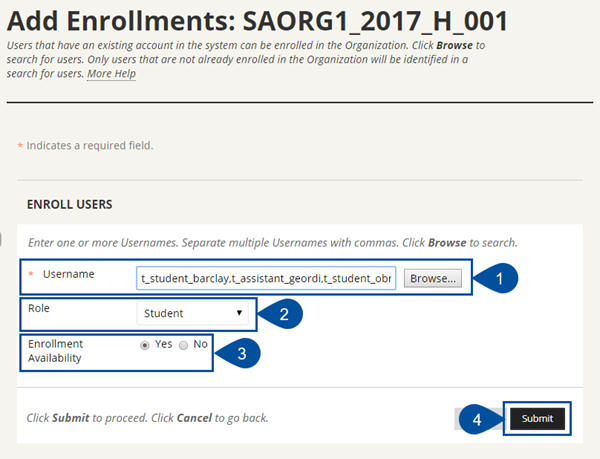
- We will then see a text box where we can type the usernames of the users we wish to add. In order to add the usernames we exported earlier, we will simply copy the text from our Word document and paste it in the text box (1). Make sure we have assigned the correct Role (2) and that the organization will be avilable (3). If everything looks good, we will click on Submit (4).

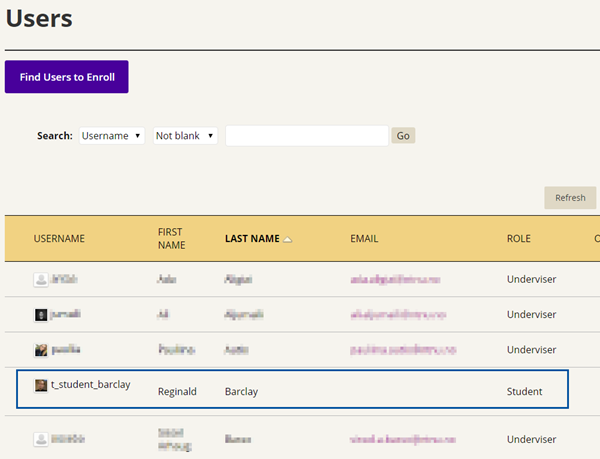
- The users will be added to the organization and we can locate them in the list of users.
Managing an organization
As previously mentioned organizations are managed in much the same way as course rooms. However, since the usage differs slightly from courses, we might need to consider how we want to manage the organization. For instance, interdisciplinary organizations might gain a large number of users. One way to manage this can be dividing the students into groups organized by for example study programs.
Have I been enrolled in an organization?
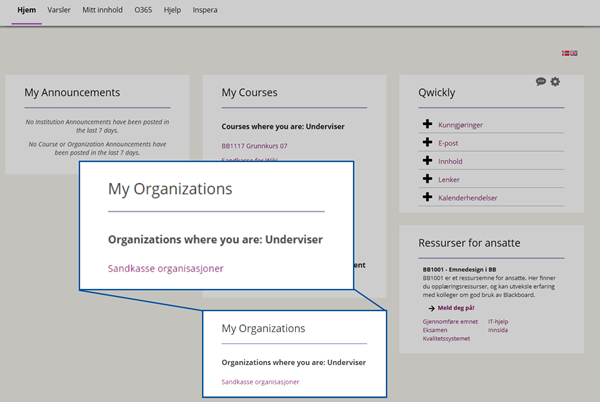
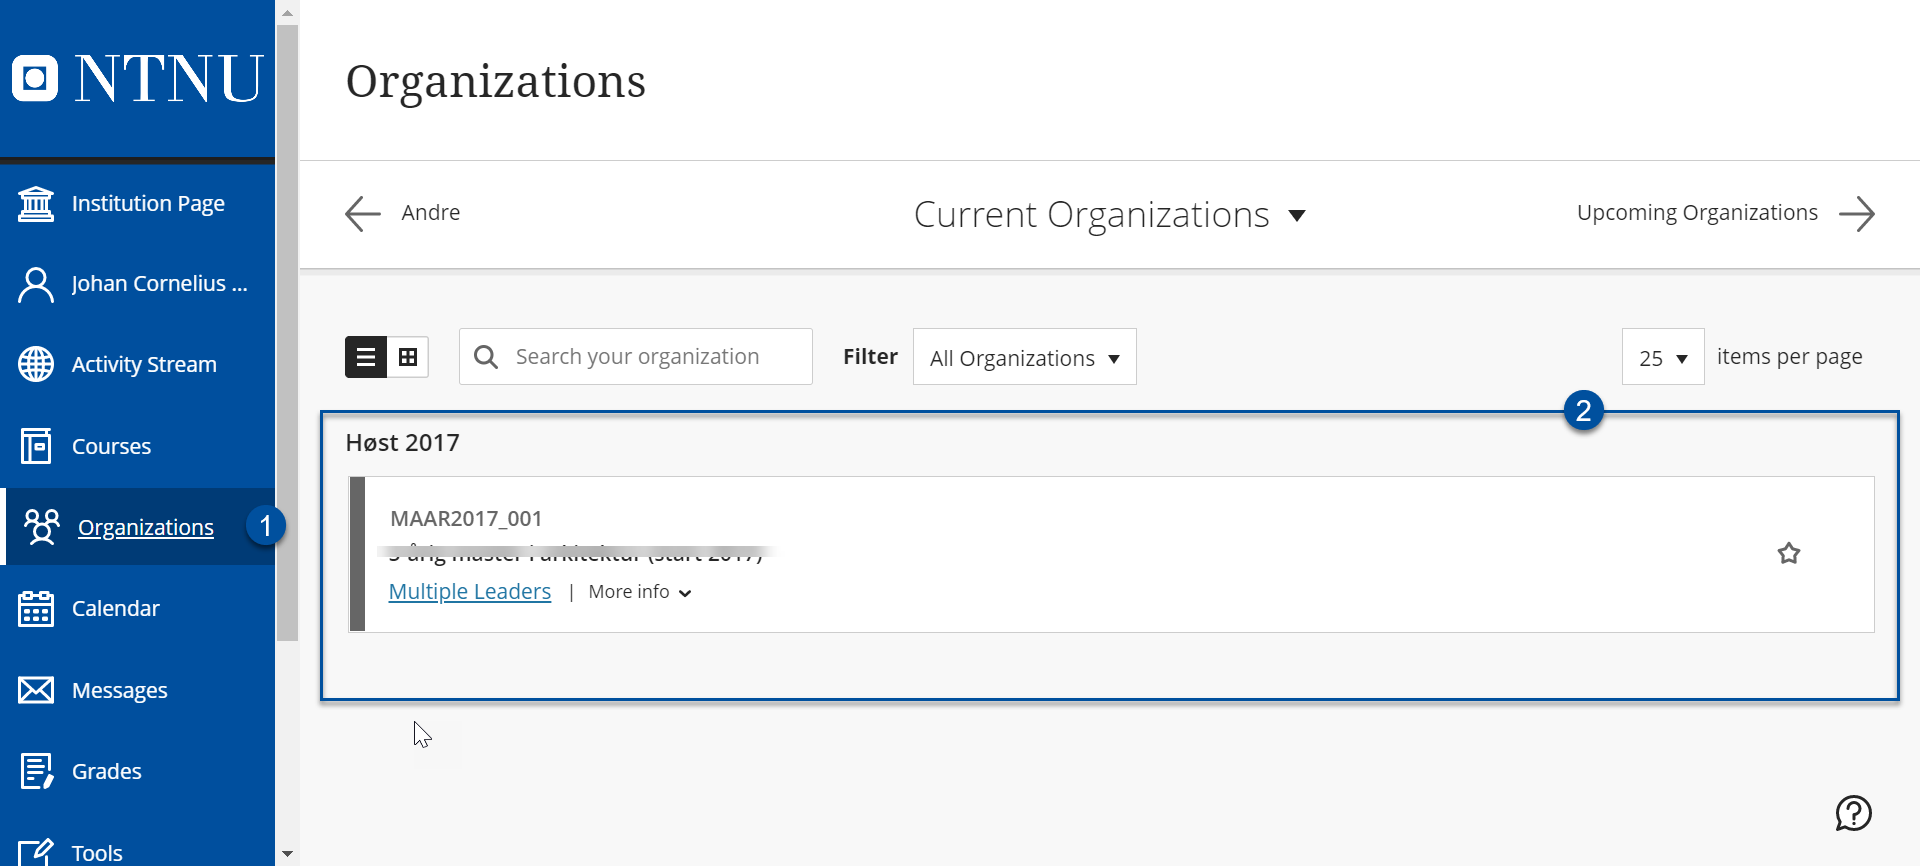
By clicking Organizations (1), the list of your organizations will appear. If you have been added to an organization, it will be displayed in this list . 
See also
Contact
Orakel Support Services can help if you have questions or if you encounter difficulties.